Connectivity Guide
Introduction
When using the Field Monitor to diagnose connectivity issues, always work from driver station, to radio, to roboRIO. On the field monitor, this means work from left to right. All connection statuses are reported to the FMS by the Driver Station (DS). This means that regardless of true connection status, a robot radio won’t fully connect until the driver station is fully connected. Similarly, the roboRIO won’t fully connect until the robot radio is fully connected.
Status Indicators describes all of the potential status indicators in detail.
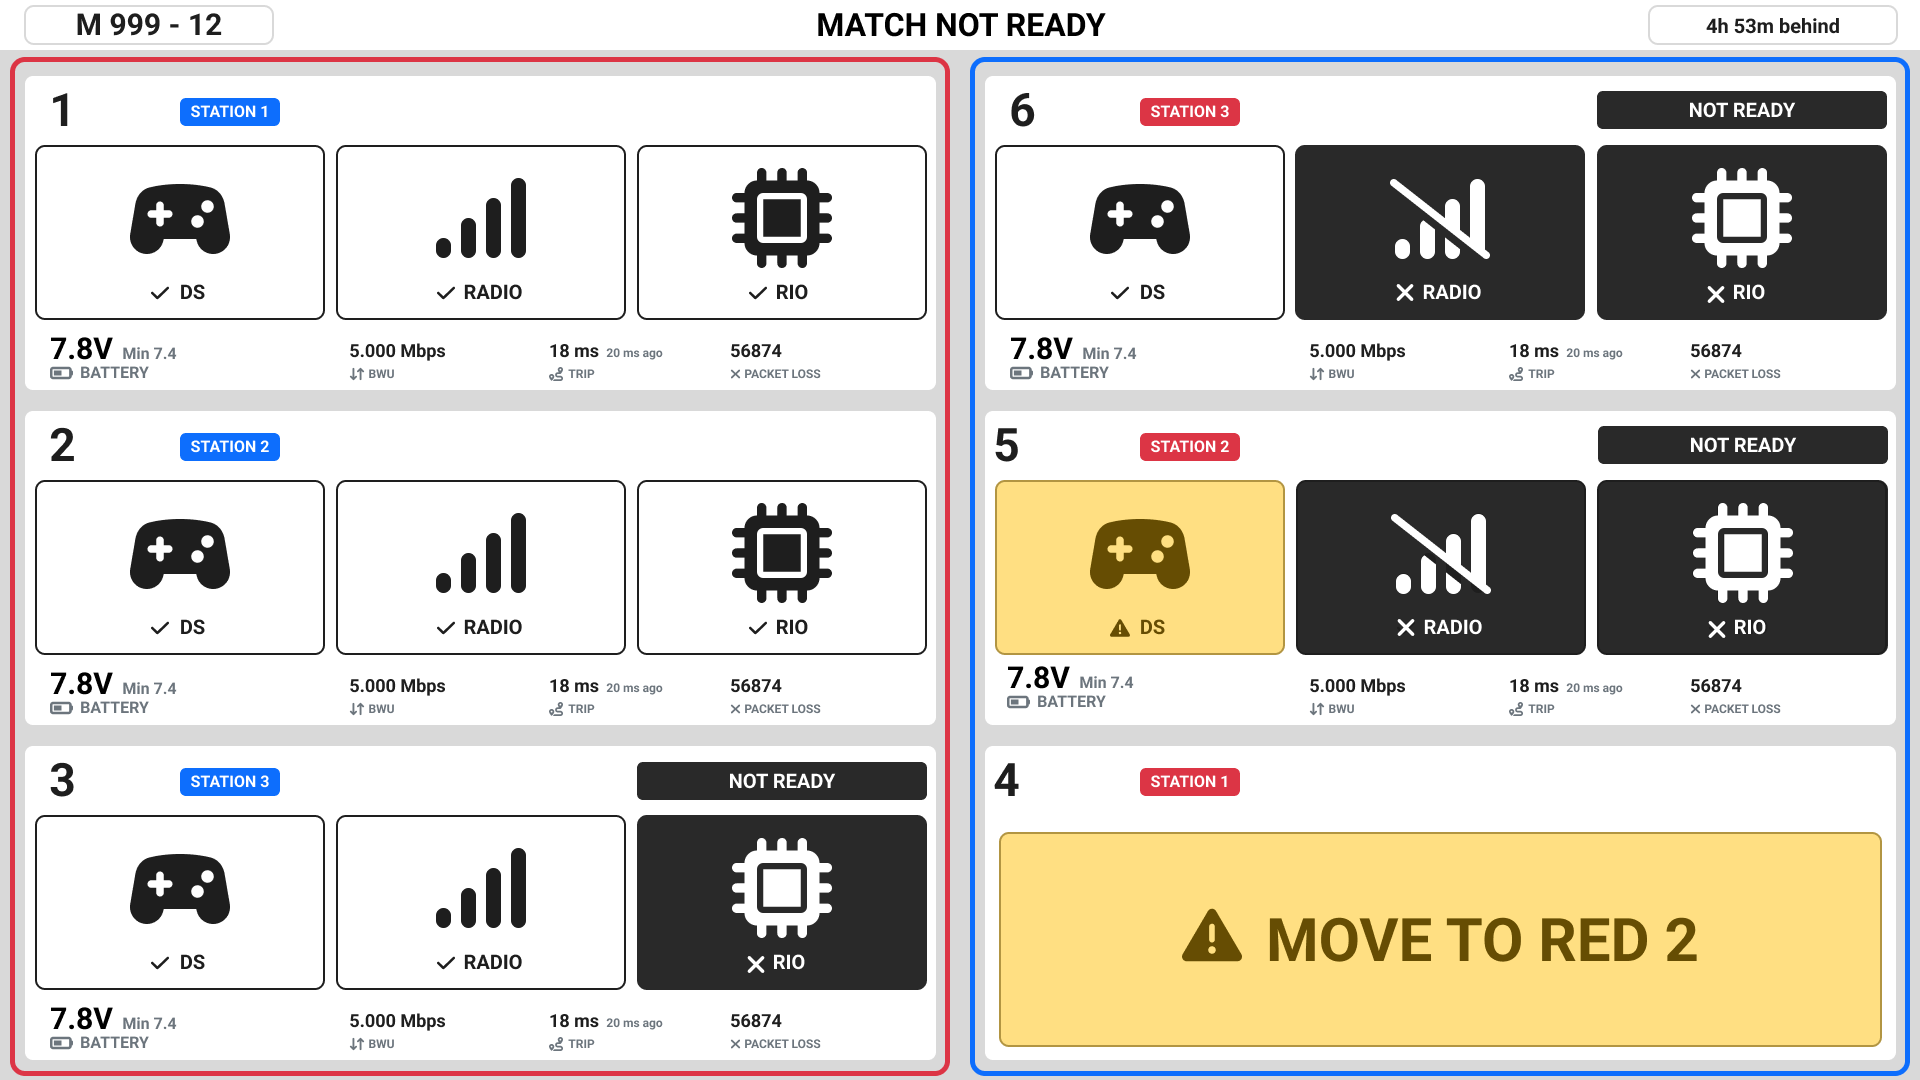
In this example, each team has a different connectivity state.
Team 1: Fully connected and match-ready.
Team 2: Same as 1.
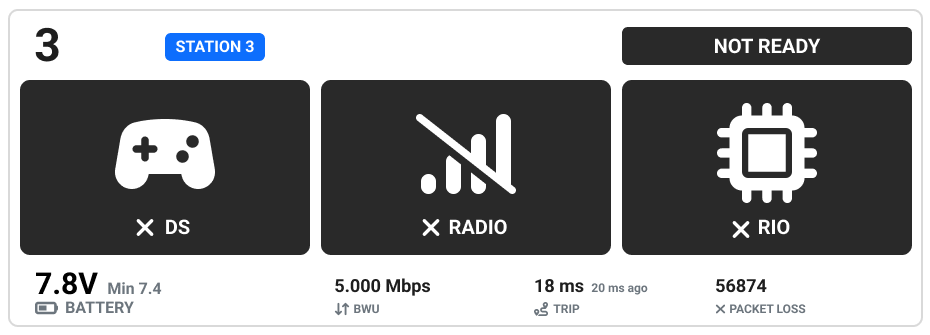
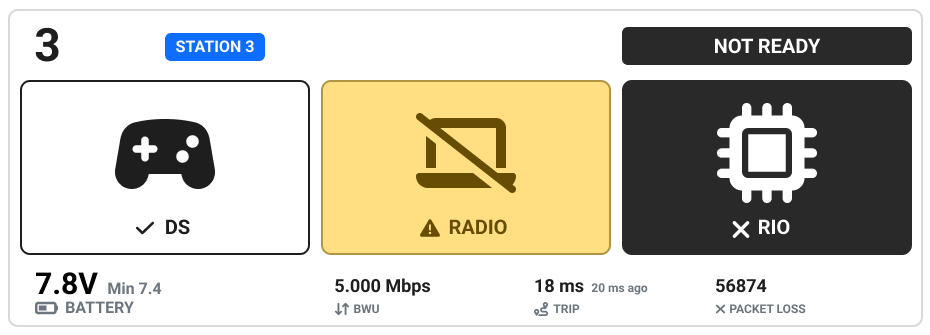
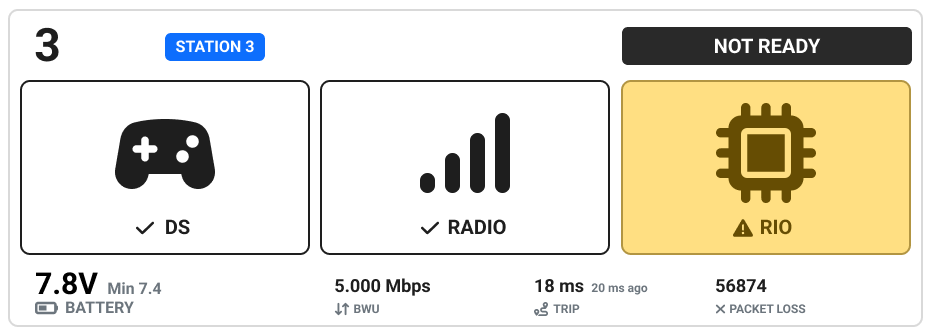
Team 3: No roboRIO connection.
Team 4: The team’s driver station laptop is connected to the wrong driver station.
Team 5: An ethernet cable is plugged in, but the driver station software is not running or is unable to communicate with the FMS.
Team 6: No Radio connection. A Radio connection is required in order to have a roboRIO connection.
Note
When troubleshooting connectivity, always start with the driver station and work your way from left to right on the Field Monitor.
Driver Station Troubleshooting
You are verifying that the driver station has Ethernet connectivity and properly configured software.
Driver Station Ethernet
This status indicates no ethernet connectivity.
Verify ethernet cable is securely plugged into the laptop, making sure to check for worn out ethernet ports.
Verify the laptop is turned on and logged in.
Verify the ethernet adapter is enabled and functioning. Quickly access network adapters by typing “ncpa.cpl” into the start menu and pressing the return key.
If the adapter is found in the previous step:
Disable/Re-enable the adapter.
Restart the laptop.
Verify the ethernet cable by connecting to a different device.
Use a USB to ethernet adapter.
Offer a loaner laptop.
If no adapter is found:
Restart the laptop.
Use a USB to ethernet adapter.
Offer a loaner laptop.
Driver Station Software
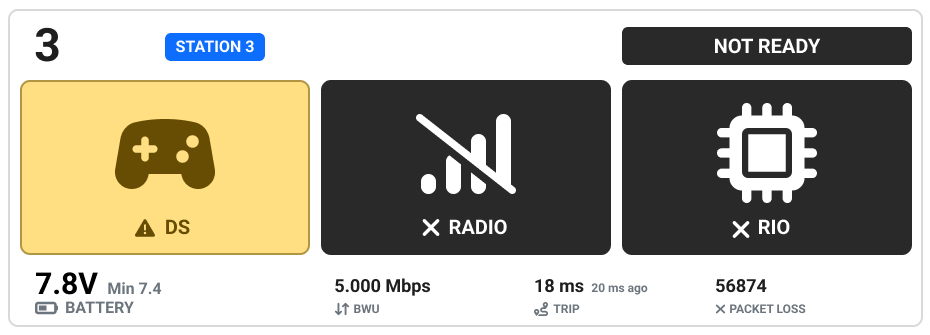
This status indicates a device is connected at the driver station, but FMS cannot communicate with the Driver Station software.
Confirm the driver station software is running.
Disable all additional network adapters. Quickly access network adapters by typing “ncpa.cpl” into the start menu and pressing the return key.
Verify the ethernet adapter is enabled and functioning. If not, move back to Driver Station Ethernet.
If the adapter is found:
Verify the adapter is set to ‘Obtain an IP address automatically’ (DHCP).
Disable/Re-enable the adapter.
Restart the laptop.
Verify the ethernet cable by connecting to a different device.
Use a USB to ethernet adapter.
Offer a loaner laptop.
If no adapter is found:
Restart the laptop.
Use a USB to ethernet adapter.
Offer a loaner laptop.
Restart the DS Software
Check whether firewalls are enabled via the Driver Station Diagnostics tab. If so, disable all three Windows Defender Firewall profiles (Domain, Public, Private) as well as any third-party firewall applications if present.
If the firewall cannot be disabled (often due to lack of admin access) consider using the loaner laptop.
If the firewall can’t be disabled but allows for specified ports to be opened, create port exceptions for:
Ports
Service
UDP/TCP 1180-1190
Camera Data
TCP 1735
SmartDashboard
UDP 1130
DS-to-Robot Control Data
UDP 1140
Robot-to-DS Status Data
HTTP 80
Camera/Web Interface
HTTP 443
Camera/Web Interface Secure
UDP/TCP 554
RTSP for h.264 Camera Streaming
UDP/TCP 5800-5810
Limelight Camera or Team Use
Release/Renew the IP address.
If the driver station still has not connected, look for other possible solutions. For example, check ethernet cable, check for odd DS configurations such as MacOS running a Windows virtual machine. flaky computer, weak battery, very high CPU usage, etc.
If the team still has not connected:
Get an FTA involved.
Offer a loaner laptop.
Follow up by working with the team to troubleshoot when time allows.
Radio Troubleshooting
This status indicates the radio is not connected to the Field Access Point.
Note: When troubleshooting a robot, a team member should perform any actions which require contacting the robot. You should only contact a robot if the team directly asks for your assistance.
VH-109 Robot Radio
Verify the robot is powered on.
Locate the radio and check that it is receiving power. (~45 second boot time)
Verify the radio is in client (bridge) mode and programmed for the event.
Blue 6GHz LED indicates the radio is in Client Mode and Linked. If the Field Monitor still does not show a Radio connected, verify firewalls are disabled on the DS.
SYS LED will blink in a Blink/Blink/Pause .._.._ pattern to indicate the radio has been programmed and is attempting to connect to the field AP. At the discretion of the FTA, the radio may be (re)programmed on the field.
If a radio is powered on and booted in client mode but does not link to the field:
Verify the radio has been programmed for the current event in progess. (Radios must be reprogrammed for each new event)
Check with the team to ensure they have no backup radios powered on in the venue.
OM5P Robot Radio (China Events Only)
Verify the robot is powered on.
Locate the radio and check that it is receiving power. (~60 second boot time)
Verify the radio is in bridge mode and programmed for the event.
Green LED indicates the radio is in Bridge Mode and Linked. If the Field Monitor still does not show a Radio connected, verify firewalls are disabled on the DS.
Amber/Red LEDs indicate the radio is in AP Mode and has yet to be programmed. At the discretion of the FTA, the radio may be (re)programmed on the field.
If a radio is powered on and booted in bridge mode but does not link to the field:
Verify the radio has been programmed for the current event in progess. (Radios must be reprogrammed for each new event)
Check with the team to ensure they have no backup radios powered on in the venue.
roboRIO Troubleshooting

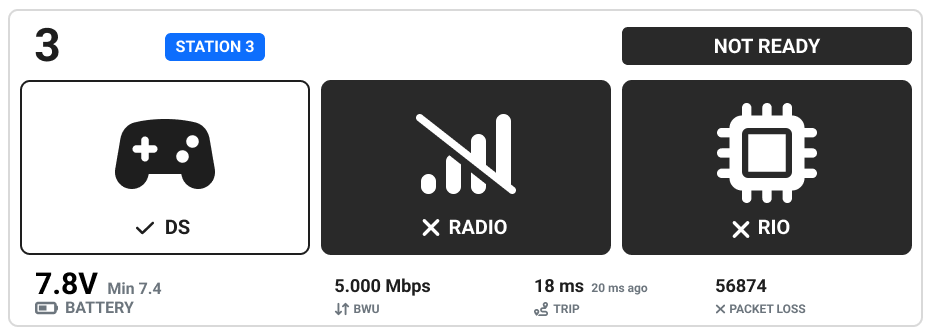
This status indicates that the driver station software cannot communicate with the roboRIO.
This status indicates that the radio cannot communicate with the roboRIO.
Verify the roboRIO is receiving power.
Check for activity on the amber ethernet traffic light on the roboRIO. If there is no activity on the link light (not flashing, or flashing very slow):
Confirm the ethernet cable is fully seated on both ends.
If the robot has a switched ethernet network, verify the switch is powered up.
Confirm the green ethernet link light on the roboRIO is illuminated. If it is not, the cable should be replaced.
Have the team move the cable to a different port on the radio, or directly into the radio if the roboRIO was connected through a switch.
Reset the roboRIO. (Circular blue button on the front panel, or via the button in the Driver Station Diagnostics tab)
Power cycle the robot.
For roboRIO 2.0 models, verify the microSD card is present and fully seated.
Confirm that the yellow roboRIO status light is not on or blinking. If it is, the roboRIO must be re-imaged.
Verify all firewalls are disabled on the DS.
Reset the roboRIO. (Circular blue button on the front panel)
Power cycle the robot.
Confirm the roboRIO is running the correct image.
Code Troubleshooting
This status indicates that the roboRIO is present, but no code is detected.
Ask the team if code was changed between matches. (If yes, the team likely did not build/deploy correctly)
For roboRIO 2.0 models, verify the microSD card is present and fully seated.
Check the Driver Station Diagnostics tab for messages from the robot.
Restart the robot code via the button in the Driver Station Diagnostics tab.
Reset the roboRIO. (Circular blue button on the front panel, or via the button in the Driver Station Diagnostics tab)